

I’m so excited to share this recipe! Aside from the homemade snickers I posted a while back, this is certainly one of the silliest and most fun little treats I’ve made. It’s just so fun making homemade versions of these treats, and I have to say, they’re yummier than the ones in the store! Growing up, I loved these ooey gooey candy eggs. Filled with buttercream and a little yellow yolk, finding these in my Easter basket was one of my favorite parts of the holiday. Now if only I had known I could have tried my little hand at making them, THAT would have been quite the Easter!
I adapted a recipe I found on Food52, posted by Ashley from Not Without Salt. (Of course. I also found the homemade snickers recipe on her site a while back as well. She’s on to something.) I adapted her recipe slightly, making a few changes here and there for the ingredients I had and my tastes. I opted out of using the yellow food coloring for the yolk. Instead, I made the yolk with caramel which I folded into a little bit of the buttercream. I actually like the color of these yolks better than the yellow; the golden caramel reminds me of the orange yolks you find in eggs from pastured, happy, healthy chickens. Plus I really love caramel, so…
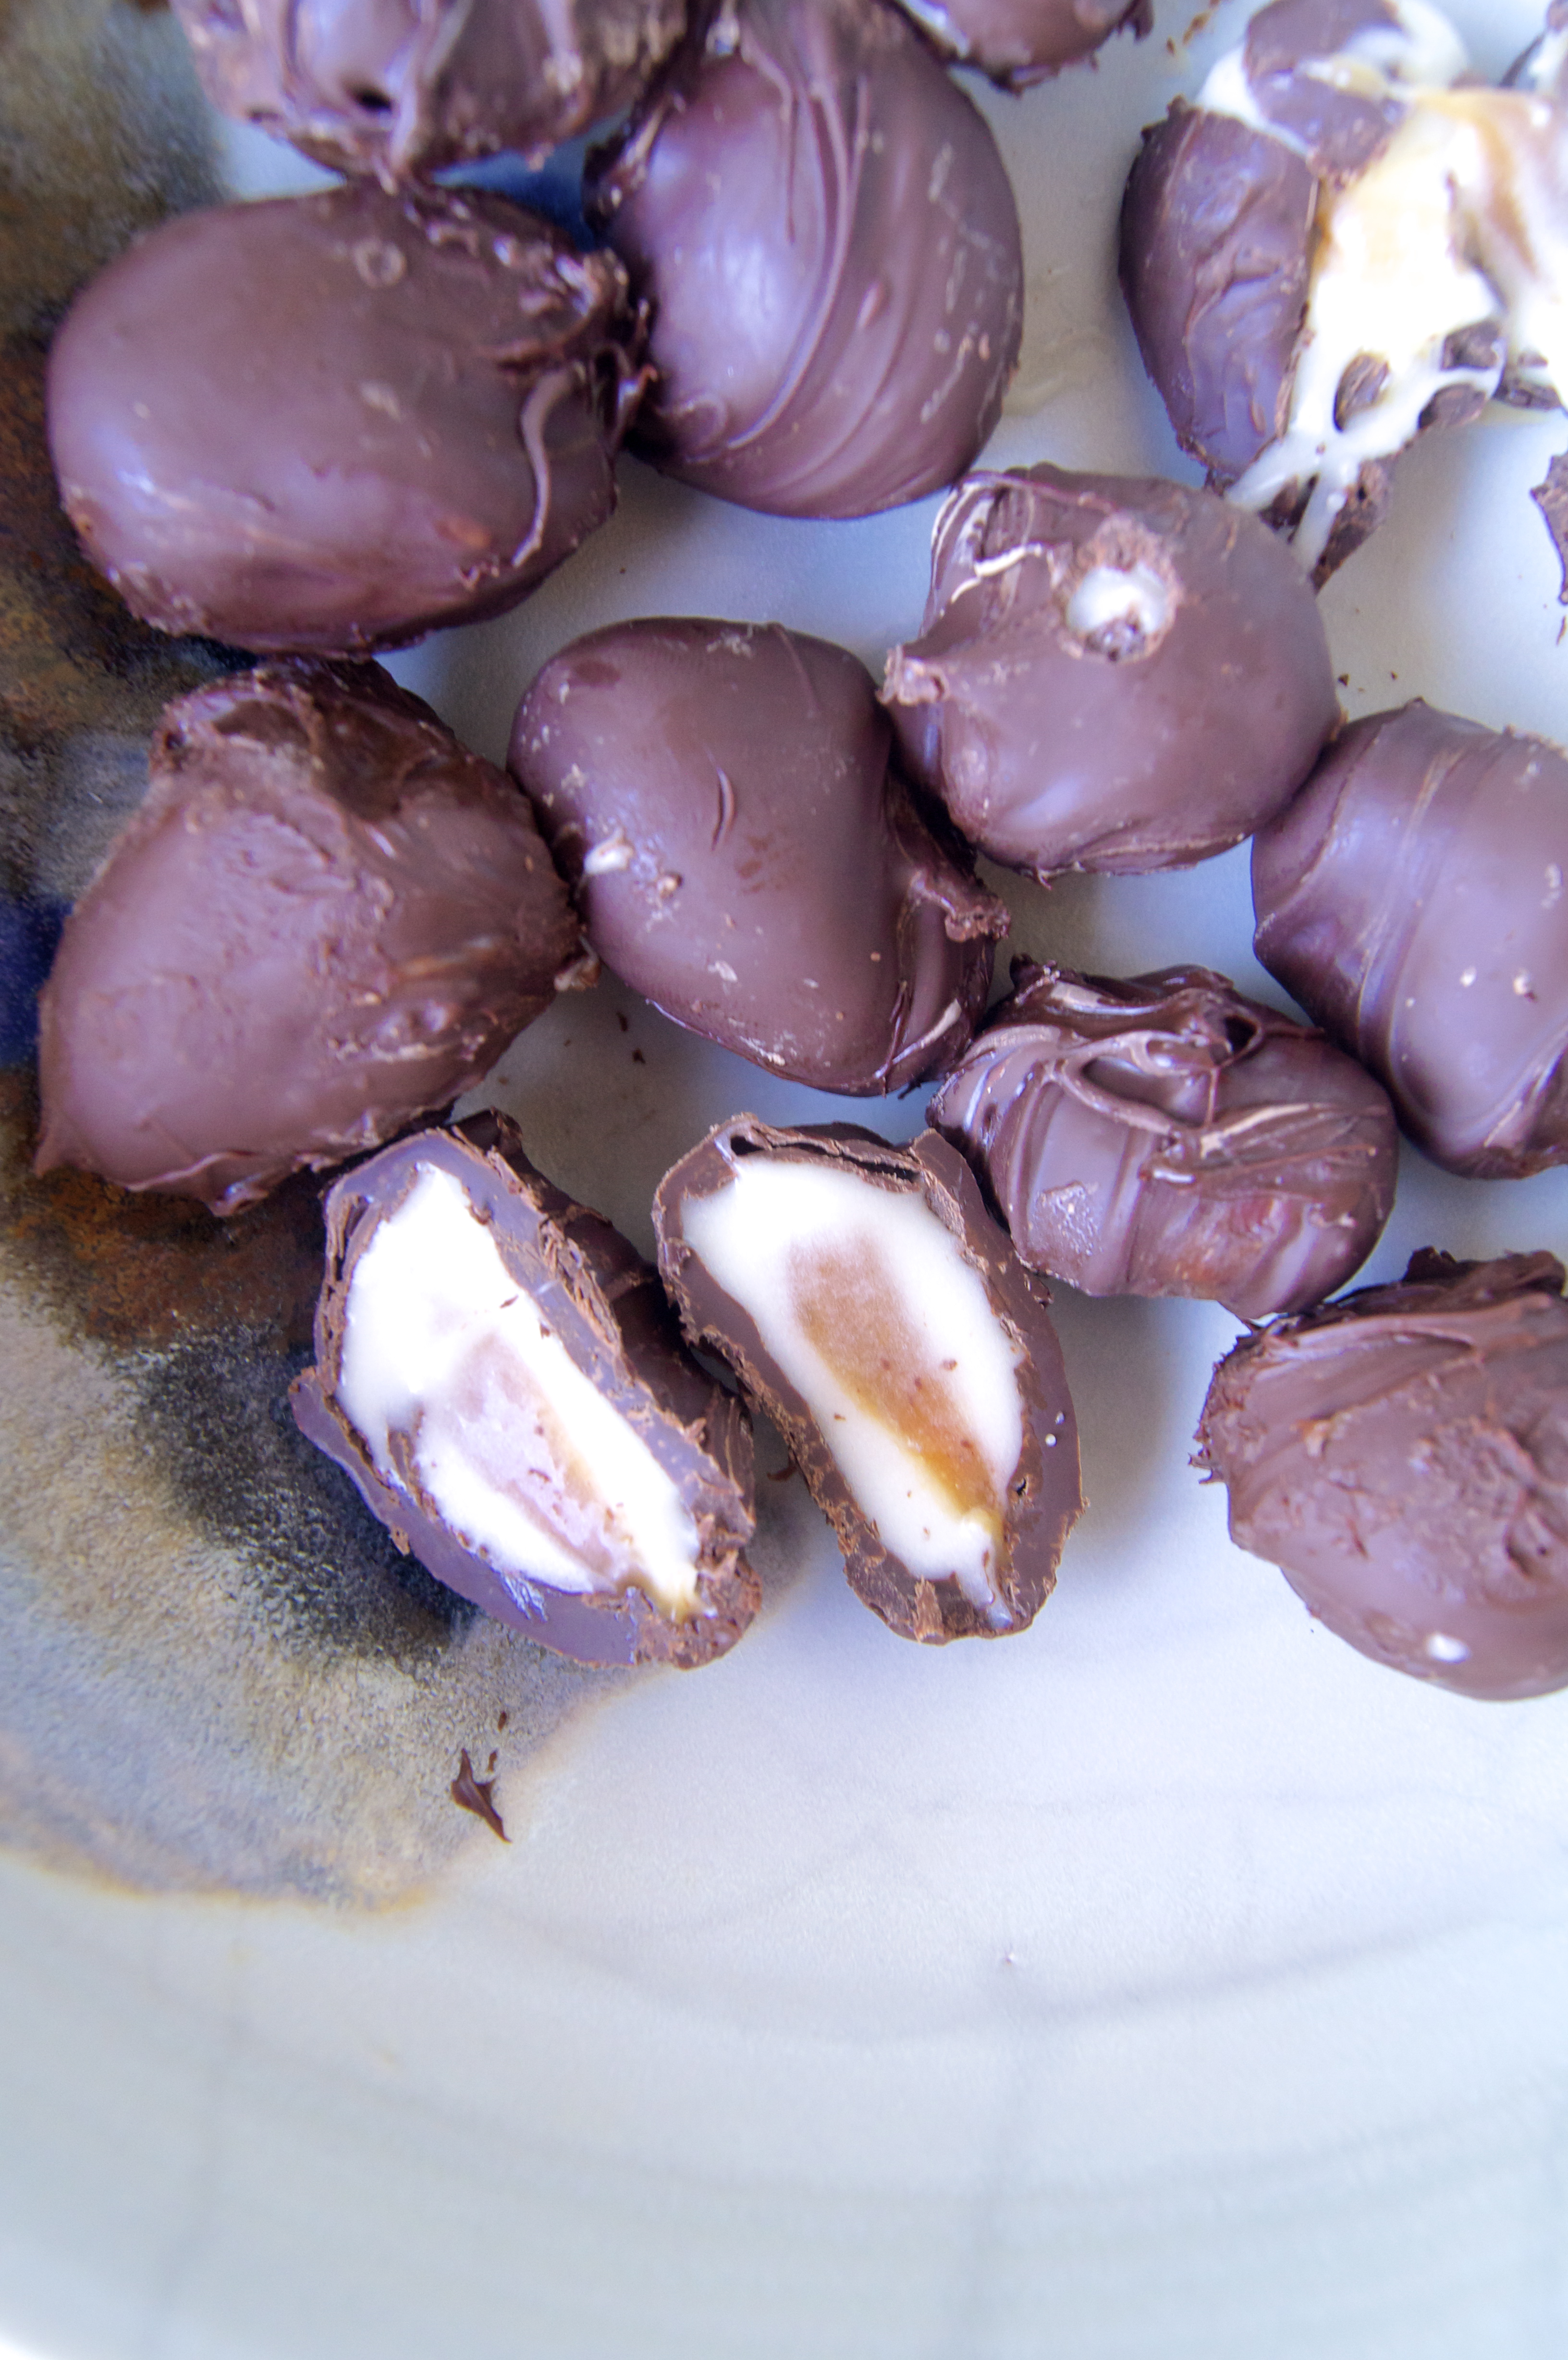
Here are my quirky little Cadbury eggs, worts and all. No perfect little egg with a smooth chocolate exterior. I’m not there yet in my creme egg-making career, and if you aren’t either, don’t worry. They’re still delicious. And you don’t even need a stand mixer to make these – I don’t have one – although it’d help.


 Homemade Cadbury Creme Eggs


Adapted from Ashley from Not Without Salt, found on Food52.
This will make about 40 small eggs, give or take, depending on size.
I will say, although this recipe is fairly easy in technique, it is still time consuming because the components need to be very cold to make the little eggs. So, plan on making a few, doing something else, returning to make a few more, etc. The end result is so worth the wait!
Buttercream Ingredients
1 cup light corn syrup*, or Lyle’s golden syrup
12 tablespoons butter, softened
1 teaspoon salt
2 vanilla beans, seeds removed (optional*)
2 teaspoons vanilla*
6 cups powdered sugar
*A note on the vanilla: if using corn syrup, check to see if there is vanilla in your syrup. If so, cut the amount of vanilla in the recipe in half. Also, if you can’t use vanilla beans: 1 vanilla bean = 2 teaspoons of extract.
Caramel Ingredients
4oz/ 1/2 cup sugar
3 oz/ 1/4 cup corn syrup or Lyle’s Golden Syrup
1/8 cup water
3 oz/ just over 1/3 cup heavy cream
1 oz/ 2 tablespoons butter, soft
pinch of kosher salt, to taste
Chocolate Coating Ingredients
24 ounces dark chocolate, chopped (or 2 bags bittersweet chocolate chips)
And you’ll need a bunch of toothpicks, to dip the eggs with!
You’ll also need something to dry the eggs on – like a few potatoes – something you can stab the little toothpicks into.
Make the buttercream!
Place the butter in the bowl of a stand mixer that has been fitted with the paddle attachment (this can also be done by hand or with a hand mixer). Add the corn syrup or golden syrup, salt, vanilla seeds, and vanilla extract. Mix on medium-low to combine, scraping down the sides of the bowl with a rubber spatula to make sure everything is mixed well. Turn the mixer to low and slowly add the powdered sugar. Mix until completely smooth, scraping down the sides of the bowl as necessary.
Transfer to a freezer-safe bowl, setting aside a couple spoonfuls in a separate bowl to mix into the caramel for the yolks. The larger bowl of buttercream will be for the “whites”. Cover both bowls well, and pop into the freezer to thoroughly chill.
Make the caramel!
Combine the sugar, corn syrup (or golden syrup) and water in a large saucepan. Stir gently to combine then wash off the sides of the pan using water and your clean hands to feel if any sugar remains on the side. If stray bits of sugar fall into the caramel it can cause the caramel to crystallize, so you’ll want to make sure all the sugar is in the bottom of the pan mixed with the water.
Place the lid on the pan and put over high heat. Having the lid on during the first few minutes of boiling creates condensation that further helps to wash away any sugar that may be left on the sides of the pan. After 5 minutes remove the lid and let the caramel continue to boil until it reaches 300 degrees F. If some of the caramel starts to color you can gently swirl the pot to combine.
Add the cream, butter and vanilla seeds once it has reached 300 degrees F and then continue to cook until the caramel reaches 248 degrees F. Remove from the heat.
When the caramel is cool enough to touch, slowly mix in the buttercream you set aside, bit by bit. Just add a little at a time, so you can control the texture and color of the caramel. Basically, you want the caramel to gain a little of the softness from the buttercream, without getting too pale. It doesn’t take much.
Transfer into a freezer-safe bowl and pop into the freezer alongside the buttercream.
Form the little eggs!
Okay, here’s the part of the recipe where it’s super important for everything to stay very cold. AKA, a lot of in and out of the freezer. If you have the space for it, you may want to use a couple of small trays, so you only take out as many “eggs” as you can reasonably work with at a time, before they warm up too much.
Have a parchment-lined sheet tray ready. When the buttercream for the whites is thoroughly chilled, remove from the freezer. Scoop out a tablespoon of your “whites” and roll it into a ball, placing it on the sheet tray. Do this for the rest of the “whites” buttercream, working quickly, since the mixture needs to stay cold. If it gets too warm to work with, put it back in the freezer for a few minutes. When finished, back into the freezer anyways.
Next, prepare the caramel yolks. Have another parchment-lined sheet tray ready — this tray can be much smaller than the other. Quickly take about a 1/2 teaspoon of the caramel, roll it into a little ball, and place on the sheet tray. Again, if the caramel gets too warm to work with, back into the freezer it goes. When all the yolks are done, let chill in the freezer for a few minutes.

When everything is sufficiently chilled, place a white in the palm of your hand and gently flatten it a bit. Create an indent in the center to place the caramel yolk in. Place the yolk in the center of the white, then cover it up and roll the white into an egg shape, and place back onto the parchment-lined tray. If at any point the sugar mixture gets too soft or sticky, you guessed it, back into the freezer. Repeat until all the eggs are formed, then let them chill in the freezer.
Make the chocolate coating! Dip the eggs!
Temper the chocolate by setting up a little double-boiler action: bring a small amount of water to a simmer, and place the chocolate in a non-reactive bowl above the simmering water. Let melt. Voila. There’s lots of talk on how to temper chocolate, but honestly, all I’ve ever done is just simply melt it over simmering water. Easy peasy.
Remove a few of the eggs from the freezer, and carefully stick a toothpick into each. Work quickly again here. Dip each egg into the chocolate, letting any excess chocolate drip off. The chocolate needs to remain tempered, nicely melted, otherwise it won’t drip off very easily. If the eggs get too warm, they’ll droop all down the toothpick and onto the unsuspecting veggie. Keep them cold cold cold. Poke the other end of the toothpick into whatever innocent veggie you set aside for this, and let dry.
If you’re anything like me, you hate wasting food, so consider covering that veggie with a piece of parchment, so you can still eat it, even if chocolate drips everywhere.
When the chocolate has fully dried, gently remove the toothpick. With your finger, dab a little melted chocolate onto the hole from the toothpick. They keep best in the fridge, but are ooey-gooier and just as yummy left in a little bowl on the counter.
Now, get out there and celebrate! Give all your friends and neighbors little candy eggs!!

